
Posting a carousel on LinkedIn isn't quite as straightforward as on other platforms—there’s no "carousel" button. Instead, you create a multi-page PDF document and upload it using the ‘Add a document’ option. LinkedIn then works its magic, turning your PDF into the interactive, swipeable carousel we all know and love. If you don't want to design slides from scratch in Canva, an AI-powered LinkedIn carousel generator can produce the PDF for you in seconds.
Why LinkedIn Carousels Are a Game Changer for Engagement

Before diving into the "how," let's talk about the "why." LinkedIn carousels are far more than just a slideshow. They're a powerful tool for stopping the scroll and holding your audience's attention. The simple act of swiping keeps people on your post longer, which is a huge signal to the LinkedIn algorithm.
When users spend more time on your content—what we call "dwell time"—the algorithm sees it as valuable and is more likely to show it to more people. That means better organic reach. LinkedIn's goal is to keep users on the platform, and native document posts (the feature that powers carousels) do exactly that.
The Power of Visual Storytelling
Carousels give you a fantastic canvas to break down big ideas into small, easy-to-digest slides. It’s a format that’s incredibly versatile. I’ve seen them work brilliantly for:
- Step-by-step guides: Walking an audience through a complex process, one clear step at a time.
- Data storytelling: Making key stats or research findings pop with compelling visuals.
- Brand narratives: Offering a peek behind the scenes, celebrating company wins, or showcasing customer stories.
- Educational content: Turning a blog post or webinar into a bite-sized, visual learning experience.
By framing your content as a story—with a clear beginning, middle, and end—you spark curiosity. People just have to swipe to see what's next. To get the most out of them, it’s smart to fold carousels into a broader plan by developing a robust digital content strategy that supports your bigger business goals.
Carousels transform passive scrolling into an active experience. By asking your audience to physically interact with your post (by swiping), you create a deeper level of engagement and information retention.
Boosting Your Reach and Follower Growth
The numbers don't lie. Industry reports consistently show that document-style posts are one of the top-performing formats on LinkedIn, often beating out single images and plain text updates. Even LinkedIn has shared that pages posting weekly see 5.6× more follower growth. When you consistently use high-engagement formats like carousels, that number can climb even higher.
If you're looking for more ways to create content that really connects, check out our guide on LinkedIn carousel best practices. The impressive performance of this format is exactly why learning how to post a carousel on LinkedIn is such a valuable skill for any modern professional or brand.
Getting Your Carousel Ready for a Flawless Upload
A great carousel starts long before you ever hit the “Post” button. Trust me, getting the technical details right from the beginning is the secret to creating a professional-looking piece of content that doesn’t end up looking blurry or getting rejected on upload.
First, let's clear something up. LinkedIn has changed how carousels work. You won't find a special "carousel" button anymore. Instead, what you’re really doing is uploading a multi-page document that LinkedIn then displays as a swipeable carousel. Simple, but you have to know how to prep the file correctly.
Nail Down Your File Format and Size
My advice? Always use a PDF.
While LinkedIn technically accepts other formats like DOC, DOCX, PPT, and PPTX, a PDF locks everything in place. Your fonts, images, and layouts will look exactly how you designed them on every device, every time. No nasty surprises.
To avoid any frustrating upload errors, keep these hard limits in mind:
- Max File Size: 100MB
- Max Page Count: 300 pages
A quick word of advice: just because you can upload 300 pages doesn't mean you should. The sweet spot for keeping your audience engaged is usually somewhere between 3 and 12 slides. Tell a great story, but don't overstay your welcome.
Quick-Look: LinkedIn Carousel Technical Specifications
Here's a handy table to keep your carousel specs straight. Think of this as your pre-flight checklist before you export your final document.
| Attribute | Recommendation | Reasoning |
|---|---|---|
| File Format | Locks in formatting, fonts, and images for a consistent look. | |
| Dimensions | 1080px by 1350px (4:5) | Maximizes screen space on mobile feeds, grabbing more attention. |
| Orientation | Portrait (Vertical) | The industry standard for a reason—it performs better. |
| File Size | Under 100MB | LinkedIn's official upload limit. |
| Page Count | 3 to 12 slides | Optimal for engagement without causing viewer fatigue. |
Getting these details right ensures your content looks polished and professional from the moment it hits the feed.
Why Your Carousel Dimensions Matter So Much
The size of your slides is a bigger deal than you might think, especially since most people will be scrolling on their phones. For an in-depth look at all content types, this Ultimate Guide to LinkedIn Post Specs is a fantastic bookmark.
For carousels, going vertical is the way to go. It simply takes up more real estate on the screen, making your post harder to ignore. It’s a proven strategy that the best creators use.
Here are the two dimensions I recommend sticking with:
- 1080px by 1350px (4:5 Aspect Ratio): This is the winner for mobile. It fills up the screen and gives your content a powerful presence.
- 1080px by 1080px (1:1 Aspect Ratio): The classic square is a safe bet. It’s a versatile option that looks good on both desktop and mobile.
If you want to see exactly how these sizes look on different devices, we've broken it down with more examples in our guide on LinkedIn carousel size.
Think Like a Storyteller
Beyond the specs, your slides need to flow like a story. You need a clear beginning, middle, and end to pull people through to the final slide.
Your first slide is your hook. It has one job: stop the scroll. Hit them with a bold claim, a challenging question, or a jaw-dropping statistic. Give them a reason to swipe left.
The middle slides are where you deliver the goods. This is your chance to break down a concept, share interesting data, or walk them through a process. Keep the text light, lean on visuals, and stick to your brand's colors and fonts for a cohesive feel.
And finally, the last slide needs a strong Call to Action (CTA). Don't just end it abruptly. Tell your audience exactly what to do next. Do you want them to comment with their opinion? Ask a question? This is how you turn a passive viewer into an active part of the conversation.
Alright, you've got your perfectly crafted PDF ready to go. Now for the fun part: getting it live on LinkedIn.
This is where people sometimes get stuck, looking for a "carousel" button that doesn't exist. The secret is that LinkedIn treats these posts as documents. Once you know that, the process is pretty straightforward whether you're at your desk or on your phone.
We'll walk through both methods right now.
The whole process really breaks down into three core phases: getting the format right, nailing the size and specs, and then creating killer content. The upload is just the final step.
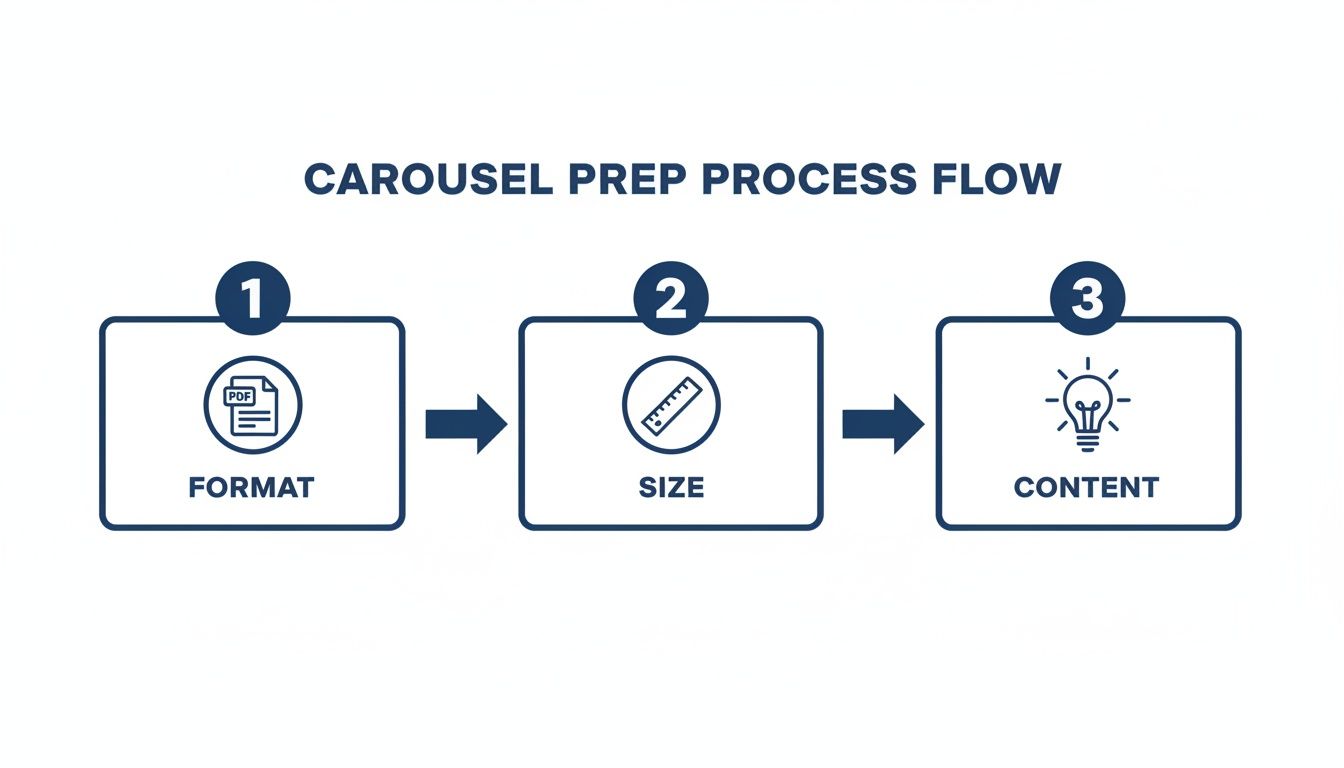
This workflow really highlights how the prep work—choosing the PDF format, optimizing dimensions, and writing great content—is what sets you up for a successful post long before you even click "upload."
Uploading From Your Desktop
I usually prefer posting from my computer. You have more screen space to work with, which makes writing the caption and double-checking everything a lot easier.
First, head over to your LinkedIn homepage. Click inside the "Start a post" box at the top of your feed to open the full editor.
Now, look at the icons along the bottom. You can ignore the photo and video options. What you're looking for is the option to "Add a document." Sometimes it’s a small document icon, but you might need to click the three dots (...) to find it.
A file browser will pop up. Find your carousel PDF and select it. LinkedIn will need a moment to process the file.
Crucial Tip: Don't skip the next step! LinkedIn will ask you for a document title. This is your chance to replace a messy file name like "carousel_final_v4.pdf" with something clear and professional, like "5 Ways to Improve Your Sales Funnel." It makes a huge difference in how polished your post looks.
Once your title is set, you're back in the main post editor. This is where you'll write your caption, add your hashtags, and tag anyone relevant. Give it one last look-over, then hit "Post."
Posting From The LinkedIn Mobile App
Working on the go? The mobile process is almost identical, just with a slightly different layout. It's perfect for those moments when an idea hits and you're not near a computer.
Open up your LinkedIn app and tap the "Post" button, which you’ll find in the center of the bottom navigation bar.
This opens the post creation screen. Look at the row of icons at the bottom and tap "Add a document." It usually looks like a little page icon with a plus sign on it.
Your phone's file browser will open, allowing you to find and select the carousel PDF you saved.
Just like on the desktop version, you'll be prompted to give your document a good, descriptive title. Do that, then tap "Next."
You’ll land on the final screen, ready to type out your caption and add hashtags. When it looks perfect, tap "Post" in the top-right corner, and your carousel is officially live for your network to start swiping through.
Crafting Captions That Drive Conversation and Clicks

A killer carousel design might stop the scroll, but it's the caption that actually gets people talking and clicking. Think of it as the opener and the closer for your visual story. I've seen far too many brilliant carousels fall completely flat because the caption was an afterthought.
Those first two or three lines are everything. That's all most people will see before they have to click "see more," so you’ve got to make that tiny bit of screen space work hard for you. My go-to strategy? Open with a provocative question, a statistic that makes you do a double-take, or a relatable pain point that your carousel directly addresses.
The whole point of that hook is to create an "information gap"—a little bit of mystery that makes them curious enough to not only read the rest of your caption but also to start swiping through your slides.
Structure Your Caption for Readability
Once you’ve hooked them, you need to make the rest of the caption easy to digest. Let's be honest, nobody comes to LinkedIn to read a novel. Walls of text are the fastest way to get someone to scroll right past your hard work.
Keep your paragraphs short and punchy, and don't be afraid of white space. It helps guide the eye. I also love using bullet points to pull out the key takeaways from the carousel itself. It just makes everything more scannable.
- Set the Scene: Quickly tell them why they should bother swiping through your document. What's in it for them?
- Prompt an Action: Be explicit about what you want them to do next. Don't leave them guessing.
- Tag Relevant People: If you've mentioned any people or companies in your slides, tag them. It's a simple way to expand your reach.
Hashtags and Calls to Action
Hashtags are your friend for getting discovered, but don't go overboard. The sweet spot is three to five highly relevant hashtags. I’ve found that a mix of a broad industry tag (like #DigitalMarketing) with more niche, specific ones (#B2BLeadGen) gives the best results. It helps LinkedIn's algorithm figure out who to show your post to without looking like you're spamming.
Finally, every caption needs to have a job to do. That's your Call to Action (CTA). You have to be direct and tell your audience exactly what you want from them.
Don't be shy with your CTA. Something as simple as, "What's your take on this? Let me know in the comments!" is often all it takes to ignite a conversation and send your engagement through the roof.
A really common goal is to send people to an external link, like a blog post or a landing page. But be careful here. The algorithm is notorious for throttling the reach of posts with links right in the caption. Analysis from platforms like Hootsuite consistently shows that it’s better to drop the link in the first comment. For a deeper dive on this, you can check out Buffer's in-depth analysis on LinkedIn statistics.
Just add a quick line to your caption like, "You can find the full guide at the link in the comments!" This little trick keeps both the algorithm and your audience happy.
Alright, you've created a brilliant carousel and sent it out into the LinkedIn world. What now? Just letting it sit there is like baking a cake and not tasting it. The real work—and the real learning—begins when you start digging into the data to see what actually worked.
This is where you stop guessing and start knowing. To do this, you'll want to tap into LinkedIn's built-in analytics.
After your post has been live for a day or so, look for a small bar graph icon at the bottom of the post labeled “View analytics.” Clicking this opens up the performance dashboard. It’s your window into how people are really interacting with your content.
The Metrics That Truly Matter
When you open the analytics panel, you'll see a bunch of numbers. It's easy to get lost, so let's focus on the ones that tell the most important parts of your carousel's story.
-
Impressions: This is simply the number of times your post appeared in someone’s feed. A high number is a great start—it means your post is getting out there. But it doesn't tell you if anyone actually stopped scrolling. For a much deeper dive, check out our guide on what impressions mean on LinkedIn.
-
Clicks: This one is a bit broader than it sounds. It tracks clicks on anything within your post—the "see more" button to expand your caption, your profile name, hashtags, and the carousel itself. A healthy number of clicks suggests your cover slide and the first few lines of your caption did their job and made people curious.
-
Engagement Rate: This is the big one. It’s calculated by dividing your total engagements (likes, comments, reposts) by your total impressions. This percentage tells you what portion of the people who saw your post were compelled enough to actually do something. It’s a fantastic indicator of how resonant your content truly is.
Speaking of which, early 2025 benchmarks show that document-style carousels on LinkedIn are hitting an average engagement rate of about 5.85%. While that’s a bit lower than multi-image posts, it blows text-only updates out of the water. It’s a solid reminder of just how effective this format can be. You can always see how this compares to other formats to get a fuller picture.
Digging a Little Deeper
Beyond the standard metrics, carousels (as document posts) give you some unique insights. Look for a metric called Document Views. This tells you how many people didn't just see your post, but actually opened the document to start flipping through your slides.
From my experience, the most insightful metric isn't always listed. I'm talking about the swipe-through rate. You have to read between the lines to find it. Compare your Document Views to your total engagements. A ton of views but very few likes or comments? That's a strong signal that people started your carousel but dropped off before the end.
Answering Your Top LinkedIn Carousel Questions
Even after you get the hang of creating carousels, a few nagging questions always seem to come up. Let's tackle some of the most common ones I hear, so you can move forward with total confidence.
Think of this as the final piece of the puzzle to truly mastering the format.
Can I Edit a Carousel After I've Posted It?
We’ve all been there. You hit "post," take a victory lap, and then spot a glaring typo on slide three. It's a gut-wrenching moment.
Unfortunately, when it comes to the carousel slides themselves, the answer is a hard no. Once that PDF is live, it’s locked in. You can't swap out a slide, fix a visual mistake, or rearrange the order.
What you can do is edit the caption text. So, if you need to fix a broken link, update your hashtags, or add a colleague's tag you forgot, you're in luck. But if the mistake is inside the actual document, your only real option is to delete the entire post and start over with the corrected version. This is why a final, eagle-eyed proofread is non-negotiable.
Think of your uploaded PDF as being set in stone. The caption is the frame around it, which you can adjust, but the artwork inside is permanent. Taking an extra five minutes to review your slides can save you the headache of a complete re-post.
What’s the Sweet Spot for the Number of Slides?
This is a big one. You can technically upload a document with up to 300 pages, but please, don't. From what I’ve seen, anything that long is a recipe for zero engagement.
While there isn't one perfect number that fits every single post, there's a clear sweet spot.
Aim for a carousel that's somewhere between 3 and 12 slides. This range is the sweet spot because it gives you enough real estate to:
- Grab attention with a powerful cover slide.
- Build a narrative and deliver real value in the middle.
- Wrap it up with a clear and compelling call to action.
It's long enough to feel substantial but short enough to keep your audience swiping all the way to the end.
I Can't Find the Carousel Button Anymore. Where Did It Go?
If you've been creating content on LinkedIn for a while, you might be scratching your head looking for a button that’s no longer there. You're not going crazy—LinkedIn changed things up.
The old, dedicated "carousel" button is gone. Now, you create a carousel by selecting the "Add a document" option.
You simply upload your multi-page PDF, and LinkedIn's interface automatically transforms it into that slick, interactive carousel format right in the feed. It's just a different path to get to the same great result.
Ready to create stunning, on-brand carousels without the design headaches or creative block? Postiv AI combines a brand-trained AI writer with a powerful carousel designer, scheduling, and analytics, turning your ideas into authority-building LinkedIn content in minutes. Start your free trial today.